For an age I wondered about Creating Custom Presets in Lightroom Mobile. In one of the more recent releases, Adobe thankfully gave us this function. Hooray!!
As we move more towards mobile, Lightroom Mobile is a great tool for editing your images on the go. The Custom Preset Option is the perfect addition for speeding up your mobile workflow.
Here is a quick video tutorial about how to do this. The video lasts about 3 minutes, and takes you through the process. Don’t forget to check out my other tutorials here.
Alternatively, if you would prefer to read and work through with pictures, then carry on below. And, there’s more! check out this Tutorial is you need to know how to get your Presets from your Desktop Lightroom onto Mobile
A Step by Step guide to Creating Custom Presets on Lightroom Mobile
Open Lightroom Mobile and the first image you want to edit.
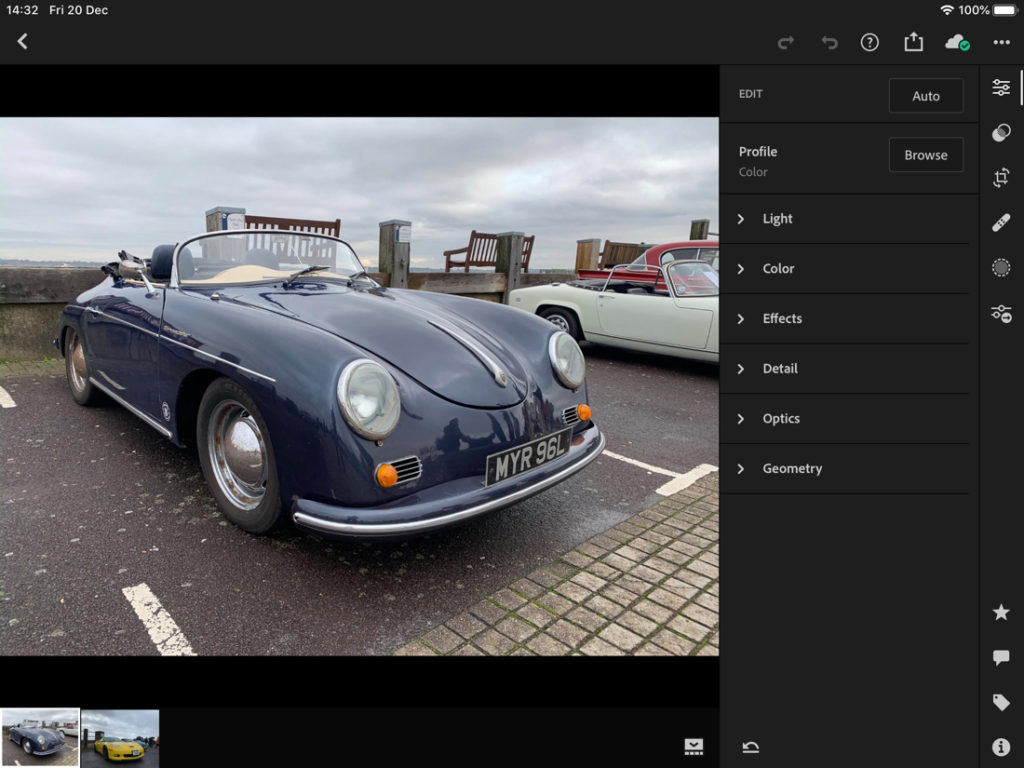
Make any edits you need to.
For this example, we will convert to Black and White, and make a couple of basic edits. Including a Vignette (There is a reason for telling you this!)
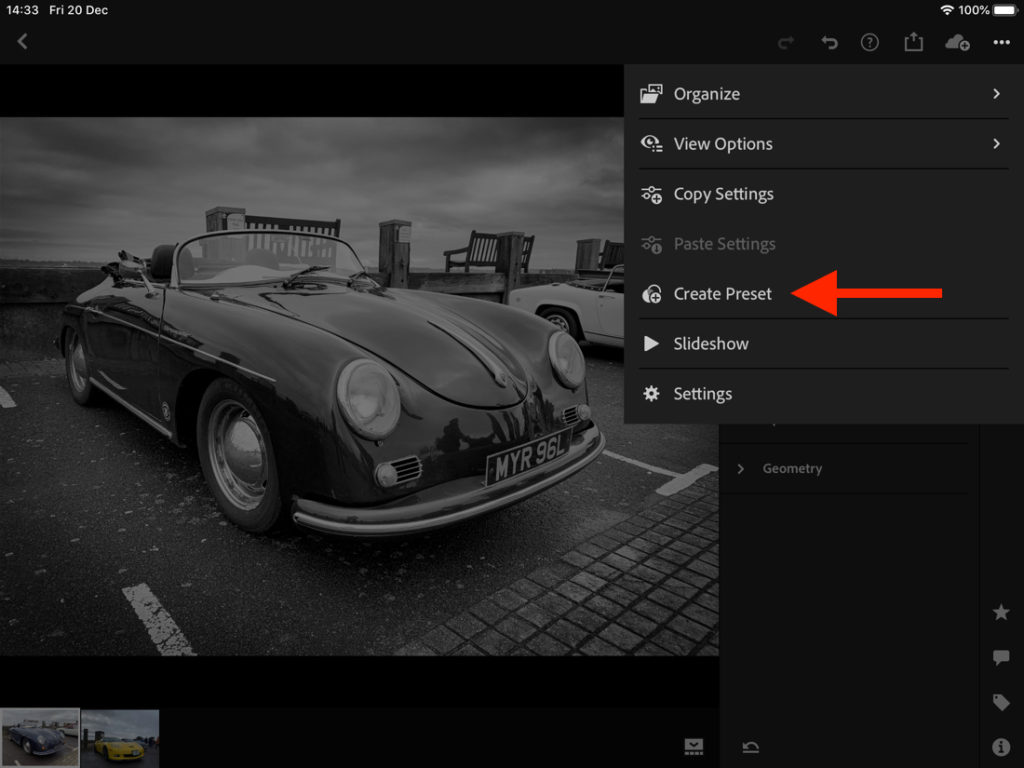
When you have done what you need to, click on the 3 dots in the top right hand corner.

This will bring up the following menu, with a few options.
Click on the Create Preset option, as highlighted below.
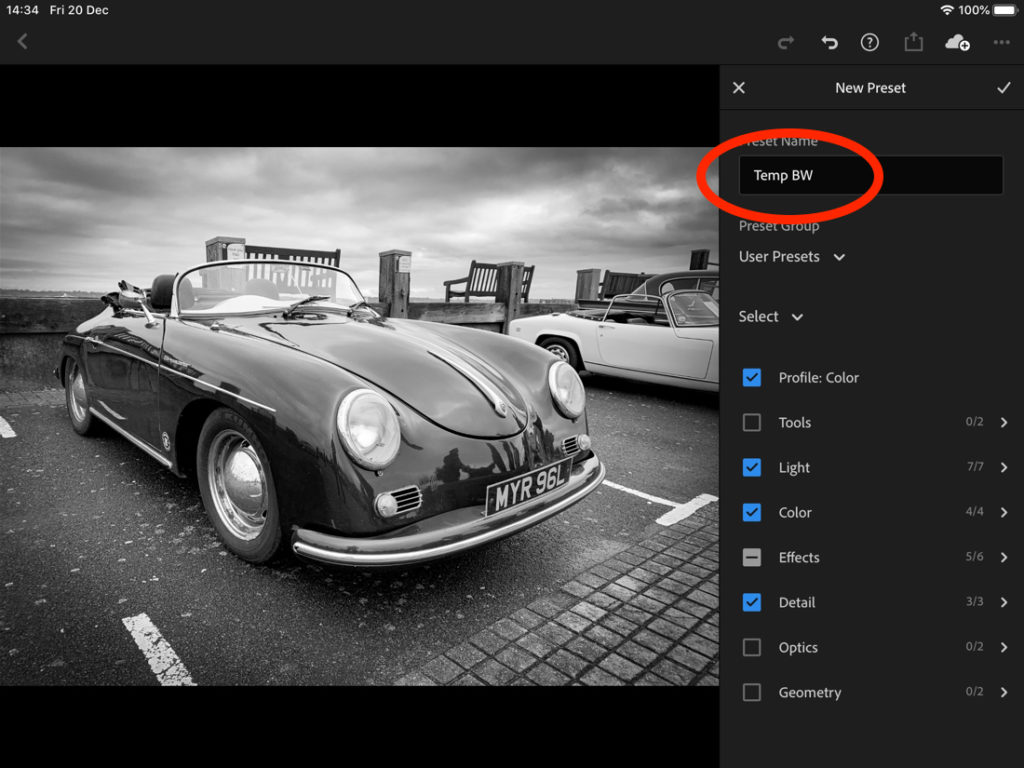
This is where you have a few options. You can name the preset and save it, or you can make a couple of adjustments.
For example, click on the Effects option, and remove the Vignette.
What this will do, is save all your edits in the preset, excluding the Vignette.

When you have unticked the ones you don’t want to save, click back until you are on the below screen.
You can then name the Preset as anything you want, and hit the Tick, this will then save the Preset with your chosen adjustments.
This now means we can apply this preset to any image.
See the below, as you can see we have another car photo which we will bring up.
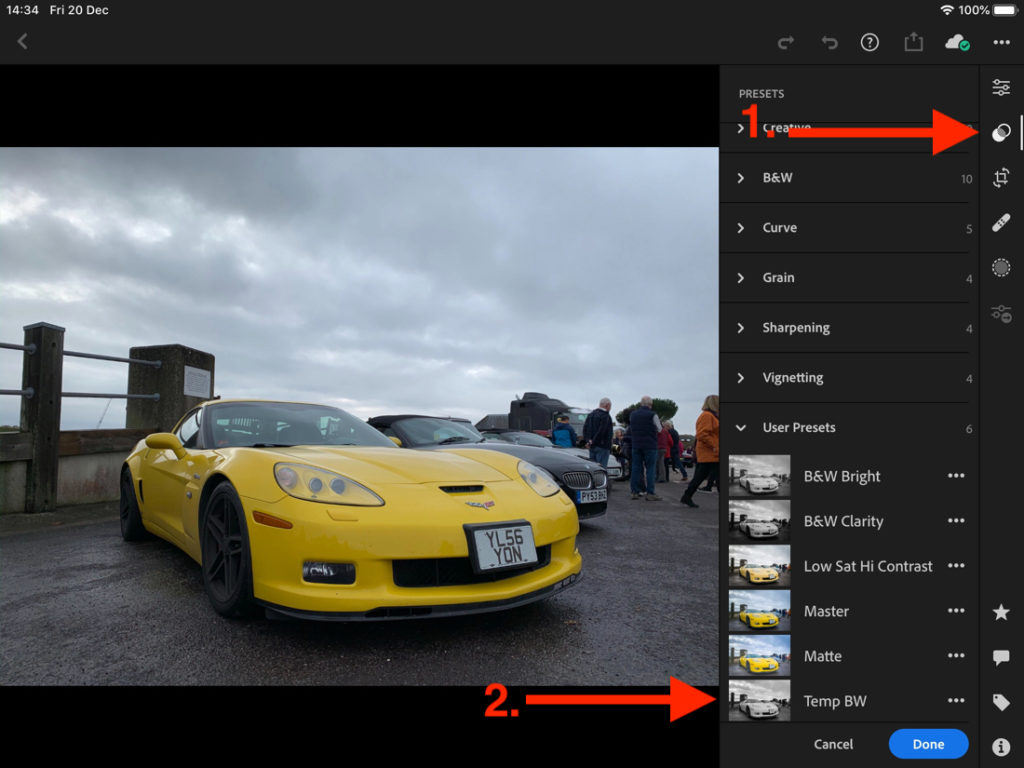
When you have, tap on the two overlapping dots, and expand the User Presets section.
You should see all the Presets you have saved, and as you can see, the Temp BW one is there we saved earlier.
Tap on it, and Lightroom will apply the adjustments saved in that preset, to the image you have loaded.

And that is it.
If you head back to the gallery you will see the two images we have just been working on.
You could then load another image, and apply that, to any other preset.
This is a great way to quickly apply similar presets over many images. Great for example, correcting white balance on a whole range of images.
I hope you have found this useful, feedback in the comments is always appreciated, and don’t forget to sign up to our newsletter to be the first to be notified of future tips and trips.
Also, head over to the YouTube channel, to see this tutorial and others.
In the meantime, thanks for stopping by!

