
I don’t know about you, but every time I take a trip or a holiday, I like to Geotag my photos. So, I thought I would share exactly how GeoTag a Photo.
I have been on some great trips in the past. Sometimes it’s nice to look back and see exactly where you took a particular photo. Even better, you can look through all the photos and see the route you took!
If you’d like a video walkthrough on how to geotag your photos, you can find it on my YouTube channel or watch the video below!
For everyone else, read on to see how to GeoTag your Photos and how to add a location to a photo.
What is a GeoTag, and why would I add it to my Photos?
Simply put, a geotag embeds the photo’s location directly into the image. This means the photo includes the map coordinates, allowing you to view the location in the appropriate software.
For example, Apply Photos and Adobe Lightroom can both show the map location of a GeoTagged photo.
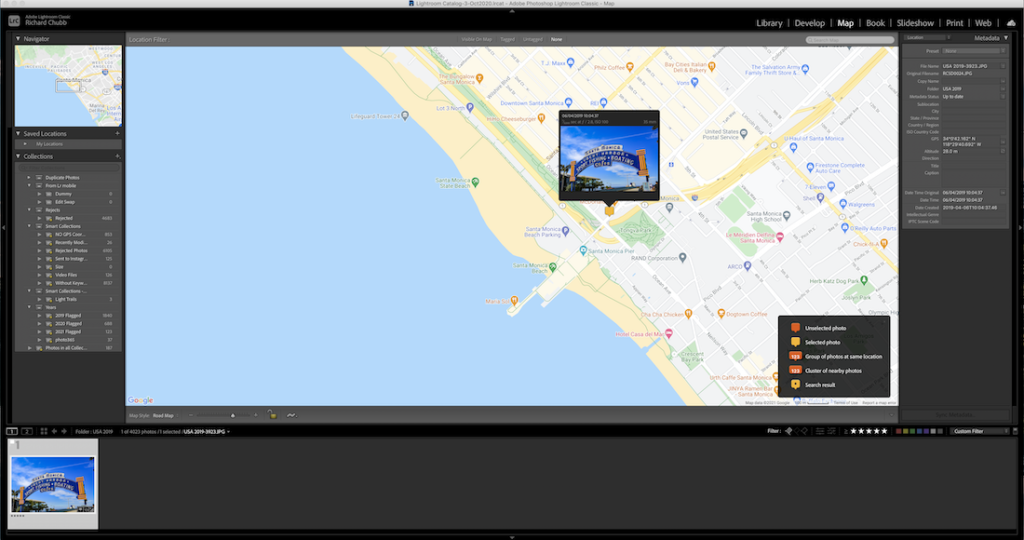
See below, a shot showing one photo and its location on the map. If you look at the photo, you can see it is the entrance to Santa Monica Pier, in California. Now look closely at the geotagged photos, then examine the map where each photo is pinned.
You can see it is pretty darn accurate.
What are the benefits of adding GeoTags or Location Data to your photos?
Well for me, it is just another way to exploit and take advantage of technology, but it is also a great way to remind yourself exactly where a photo is taken. Perhaps you want to go back and try again when the lighting is better. Or maybe you just want to use it to reminisce?
I also like looking back on trips and seeing the route we took. For example, here are a couple of routes. One from the old iPhoto system of our 2013 USA Road Trip. The other is from our 2017 Canada Road Trip, using the Lightroom map module.


I love this because I can look back, click on a pin, and see the photos I took at any given location.
In-Camera or Third-Party App to Geotag your Photo?
Some cameras can automatically geotag photos when they’re taken. My Canon 1DX mk2 has, but I don’t tend to take this on trips, as it is too big, heavy and bulky.
I am more than happy to shoot with my Canon 5d Mk3, as it still takes great photos, despite being 9 years old! Unfortunately, though, it doesn’t have the built-in ability to GeoTag photos.
If yours does, then great. All you need to do is activate the function, make sure it picks up a satellite, and away you go. Bear in mind though, that this option does suck the battery life up more than usual.
If it doesn’t though, then you will need the help of a Third Party App.
My app of choice is GeoTag Photos Pro. It is a simple app, you don’t need to have an internet connection for it to work either!
Just search for GeoTag Photos in the App Store or Google Play, and download it to your phone.
You can find full instructions on how to use it on their website. It is so simple, that you probably won’t even need instructions.
Now, let’s move on to how I use it, and how useful I find it.
The Most Important thing when you GeoTag a Photo
This is the most important thing you have to do when getting ready to GeoTag your photos, is to make sure the date and time on your phone match exactly the date and time on your camera.
This is because the location from the GPS app at any given time, will look for the same time in a photo, and apply that location data.
The reason for this is, let’s say your phone says it is 12 midday. But your camera says it is 12:02. It’s only 2 minutes, yes, but think of this.
You are driving down the Pacific Coast Highway in California, a passenger in the car. You see a stunning view and shoot that out of the window. The time on your camera says 12:02. The time for that exact location on your phone/app says 12:00.
You then carry on driving for a couple of minutes, and you get a mile down the road. The app records that location at 12:02 and matches this to the 12:02 photo. You have location data that is nowhere near where you took the photo. The Geotag time won’t match the photo’s time.
Now, yes, two minutes isn’t far, and if you are on foot, the chances are you may not have moved very far.
But, what if you have just stepped off the plane?
So many times I have taken a trip, into another time zone. My phone has updated to the current time, I have forgotten to do the camera, and all of a sudden, the time on my photos and the time on my locations are 5 hours apart!

Just make sure these match, that is the important thing! To the second if you want to be precise. I usually wait for my phone to flip to the next minute before pressing OK on the camera, so the time matches to the second.
Or, you can check this when you go and set up a new trip, see below process.
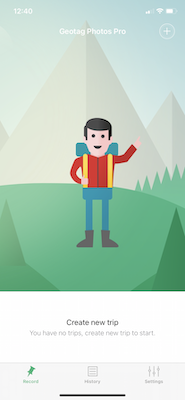
Creating a Trip in the App
Once you have the app downloaded, you should see a screen similar to this.
Click on the + sign in the top right-hand corner.
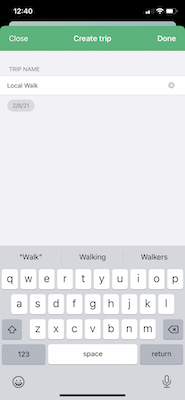
Once you have, you just need to name your trip. I am just naming this as Local Walk.
When I do this, I tend to just use one Trip per actual Trip.
What I mean is, even when I did a three-week holiday around California, I just called it ‘California Trip’, and let it run for 3 weeks.
Once you have named the Trip, it takes you back to this screen.
This now gives you the perfect opportunity to check the time on your camera, to the second if needed.
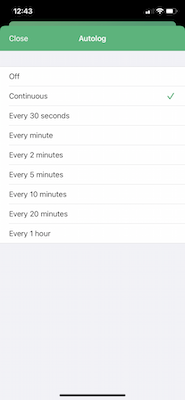
Above the green start button, you have a drop-down box where you can change the regularity of the location snapshot.
So, it can record your location at various intervals.

I use Continuous.
I refer back to my previous note about driving down the road.
It is surprising how far you can drive in 30 seconds if you are travelling at 50 miles an hour and snapping away from the car window.
You have to let the app access your location, so if you get this message, you will need to pop over to the setting, to adjust this option.

You should pick Always here. If you were to pick ‘While Using the App’ when the app is closed, you may find it doesn’t record your location.

When you have done all the above and returned to the app, you can click on the Green Start Button. The app will then find your location, and make a recording of your location every time it changes.
Recording Your Locations
Just to recap, you have set up your App, and you have synced the time.
This now means that when you start to GeoTag your photos, your phone will record your location, with a timestamp, each time you move or after a certain amount of time.
So, let’s get out on the road and take some photos!
There is not a lot you need to do. As long as you remember to start the Tagging, and the times are synced, just shoot away. The app will automatically record where you are at any given time.
When you finish your trip or your shoot, you just need to head back to the same screen. The Green Start Button will be replaced with a Red Stop button. Hit Stop, and depending on your settings, the trip will either upload automatically to your GeoTag account, or you will have to upload it yourself.

- This is the main screen after the Trip has been stopped
- Click on History, to show all the trips
- Tap the Trip to see the actual route
Next, we will look at what we do after the trip and the photos have been taken.
Adding the GPS coordinates to your Photo
You’ve returned home with memory cards crammed with amazing shots. It is now time to GeoTag some Photos and get the coordinates embedded into the image.
Add Photos to Hard Drive and Import into GeoTag App
When you are home, add your photos to your catalogue however you usually do. By copying them from the memory card, importing them into Lightroom etc.
As long as you know where the photos are saved on your hard drive. You can even Geotag the Photos while they are still on the Memory Card, in case say, you want to import them directly into your editing software.
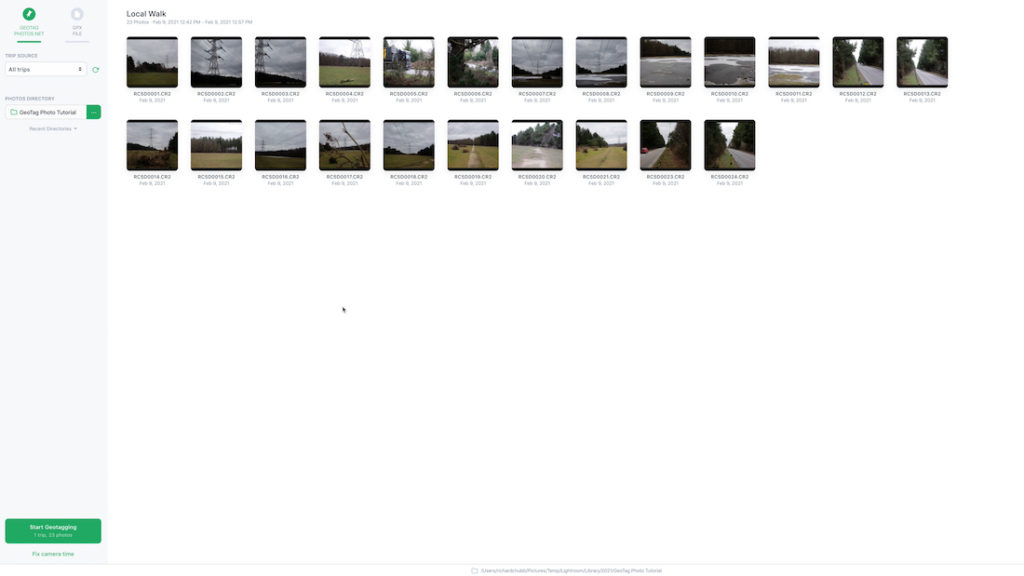
Open the desktop app of GeoTag Photos, and you should have a screen like the one below, and in the top left-hand corner you just need to select the trip name and the folder you saved the images in.


You could also leave it as All Trips, as it will GeoTag by time.
When you have found the folder, the app will load the photos.
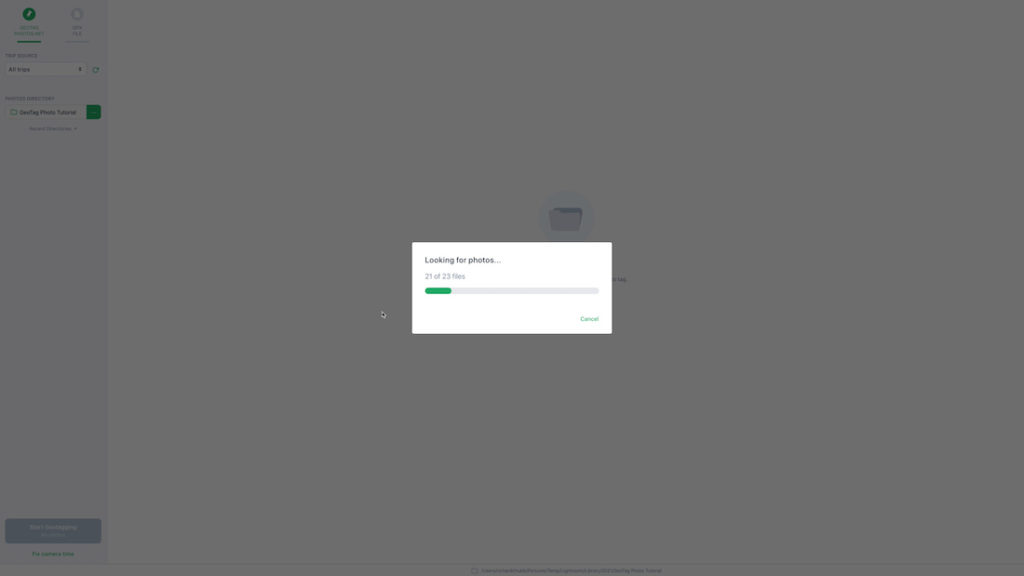
When done, you will have thumbnails of all the photos.
The next stage is to link the photos with the Trip File you uploaded earlier
Merge Trip File with Photos
Once you have the thumbnails on your screen, you just need to merge them with the Trip, or GPX file, you uploaded when you finished your trip or shoot.
You can leave the box in the Top Left-Hand corner as All Trips, as it will match by date and time, or you can drop it down and select the trip you uploaded.
When you have done this, hit the green button in the bottom left-hand corner, Start Geotagging.
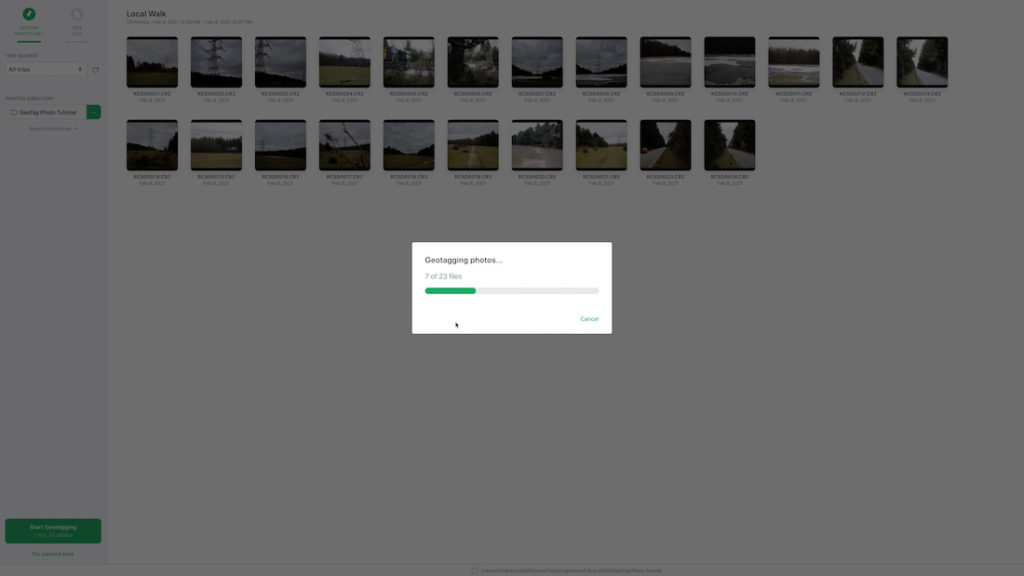
The above dialogue box should appear, and you just need to wait for it to geotag all the photos.
Once done, you should get the following message.

The number of files Geotagged should match the number of photos in the folder. If not, it means some have been missed. The only time this has happened is when I have messed up the time, and there is a photo, with no GeoTag info.
And that is it!
Summary of how to GeoTag your photos
- Install the GeoTag Photos App on your Phone, and your Desktop
- Sync the camera time with the App / Phone time
- Take Photos
- Upload Trip to Geotag Photos Pro server
- Add images to the Computer
- Load Photos into Desktop App
- Merge with GPX / Trip File
- Import into your chosen software to view on a map
And that is how you GeoTag your photos if your camera doesn’t not have the ability to.
Really easy, really simple, and great fun for when you may want to look back in years to come at where a photo was taken. Or to see all your photos mapped out.
Do you GeoTag your Photos? How do you do it?
Let me know in the comments below!
Until next time…….Rich