How to Focus Stack in Lightroom and Photoshop
Welcome to the latest tutorial, where I am going to quickly tell you How to Focus Stack in Lightroom and Photoshop.
Firstly, I am sorry to disappoint but you cannot Focus Stack using multiple images in Lightroom alone. It just does not have the capability.
However, if you have a Lightroom and Photoshop subscription with Adobe Creative Cloud, then this process is really quite simple.
Video of how to Focus Stack in Lightroom and Photoshop
If you are looking for a video version of the instructions, then check out the below. Or head over to my YouTube channel, where you can find this, and many other videos you may find useful.
Edit and Sync all Photos in Lightroom
OK, let’s get started.
Have all the photos you want to stack in Lightroom, and choose one to edit. In the below image, I have rated them all 5 stars. Next, I have filtered on 5-star images which means all the other shots from that shoot are hidden. This leaves me with just the 3 I want to work with.
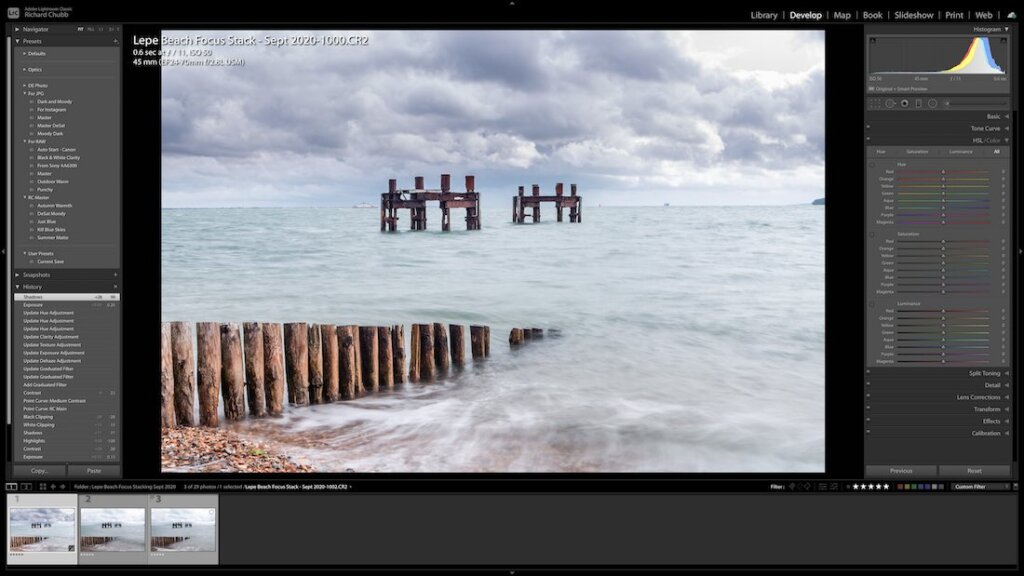
Edit the images so they are all similar in exposure, colour, sharpness etc. These three shots were taken one after the other, and the lighting conditions remained consistent throughout, so it was easy to ‘Sync’ the adjustments of the first image, over all the others. This is easily done in Lightroom, before taking the images over to Photoshop for Stacking.
To do this, in the Develop module, just click on the three images, ensuring the edited one is clicked on first, then just click the Sync button.

Once the edits have been copied over all the images, and you are happy with the results, you Right Mouse Click, and choose Edit in > Open As Layers in Photoshop

Once they open, you should find you have a new file open in Photoshop, and the three layers are the photos that were previously in Lightroom.

Next up, we have to isolate all the parts of the images that are the sharpest. Now, one option is to do the Edit > Auto-Blend Layers option, which lets Photoshop do all the work. However, this can be a little unreliable. If you want to try this option, then check out this post.
Photoshop – Making the whole image sharp
But, as the photographer, you know what images you took, and know which parts should be the sharpest. You know where you focus. So, starting from the top, you just need to brush out the layers to reveal the sharpest part.
The below images shows the photo, and where I focused for each of the three images. Therefore, I need to ensure that these parts are left in the final image.

Essentially, I want to keep the purple section of one photo, the pink section of another, and the grey section of the third, as this is where I focused.
So, I just need to ‘Brush Away’ the part of the image I do not want. Currently, in Photoshop, the top layer is the image where I focused in the distance. The means for the top layer, I need to remove the Pink and Grey sections.
Make sure the Top Layer is highlighted, and click on the indicated button to add a Layer Mask, ensuring this is highlighted on the layer.
Then, make sure you have selected the brush tool, with an Opacity and Flow of 100%.

Then, brush away the part of the photo you do not want.
This will essentially erase the top layer, revealing the layer underneath it. You repeat this process for the middle (and other layers where necessary).
At the end of the process, you are left with only the sharp parts of the photo you want to save, as you have ‘erased’ the out of focus parts.
See the below snapshot of the layers panel. The black indicates the erased sections of that layer. So, for layer 1002, we have erased the bottom half, which reveals 1001.
Layer 1001 we have erased the bottom part, revealing the layer 1000.

Merging Sharp layers, and sending back to Lightroom
This means, the final image will have the top part of 1002. The middle part of 1001 and the bottom part of image 1000.
It is quite difficult to explain, and much easier if you watch the below video. This should start from just this section of the tutorial.
Focus Stacking in Lightroom and Photoshop – Sending the image back to Lightroom
Once you are happy that you have all the sharp parts of the layers, it is time to flatten the image, and send the final photo back to Lightroom.
Click on Layer > Flatten Image.

This will merge all the layers, and you should see just one layer in the bottom right hand corner now, as per the following.

Finally, to finish the this tutorial on how to focus stack in Lightroom and Photoshop, all you need to do is to click on File > Save.
This will send the image back to Lightroom, as a merged file. All the sharp, in-focus parts of each photo are saved as one. See below, the .tif file is the ones saved from Photoshop.

Summary – How to Focus Stack in Lightroom and Photoshop
Quite difficult to explain in a blog post. Watching me do it in the Video will make a lot more sense, but I hope this was useful.
I have done a few tutorials now, such as How to change names of Photos in Lightroom and Matching Exposures for Multiple Images in Lightroom.
Please feel free to drop me a comment, or head over to my YouTube channel for more videos Photography related, and in the meantime, thanks for stopping by!

