Lightroom’s Radial Filter – My Favourite Feature
It has many amazing features, but Lightroom’s Radial Filter is probably one of my favourites. On this website, I love talking about editing and photography, so it is great to do a post on one of my favourite editing tools.
It has such an impact on the photo, and it is so simple to use.
But, guess what, if you would prefer to learn all about it in video form, then hear you go!!
Or, if you would prefer to read all about Lightroom’s Radial Filter, then please continue!
What does Lightroom’s Radial Filter actually do?
Lightroom’s Radial Filter does a superb job at easily, but subtly, highlighting the area of the image you want the viewer to look at.
Take a look at the following, admittedly, simple images.


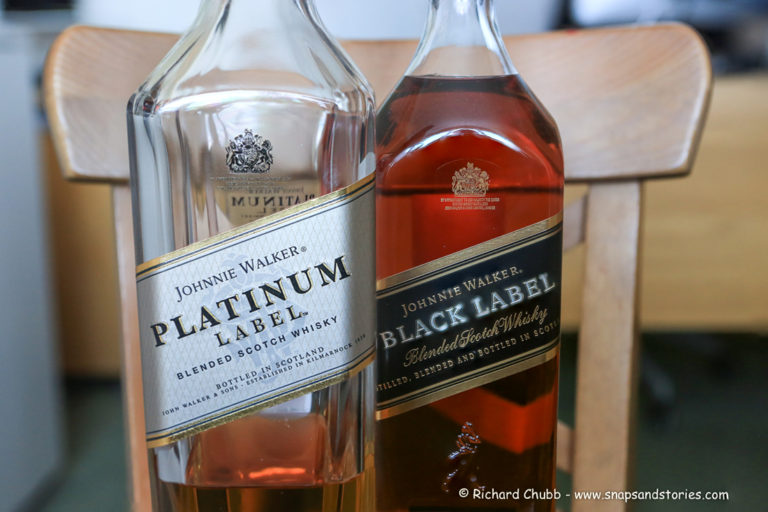
The one on the left is straight of camera. The one on the right, has just a Radial Filter applied. No other edits whatsoever!
Look at the difference it makes. The subject is brighter, pops more, and generally stands out, as the subject should. And it took less than 3 minutes.
But, how do you do this so quickly.
Where is the Radial Filter Option in Lightroom
Assuming you haven’t customised it, the option you need is in the Develop Module, located just under the Histogram.
There are a number of different icons, filters and adjustment options. The one you need is the Circle, as indicated here.
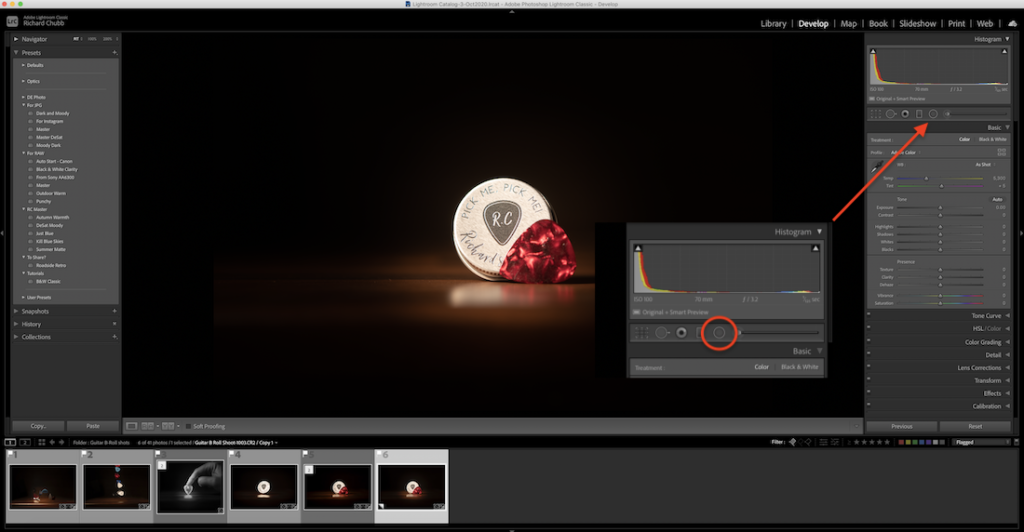
Click on this, and your cursor should change to a Cross.
Place the cursor on the centre of your subject, and click and drag. Hold down the Shift key if you want a perfect circle.
Don’t worry about being too precise as all the above can be changed later.
Release the mouse, and you should be left with circle on the screen. This is the Radial Filter and will form the area your edits centre around.

Lets move onto to how we can adjust and edit it.
Adding Adjustments to the Radial Filter
With the circle still still visible, you can hover over the circle and your cursor changes to a Hand.
This allows you to click and move the filter anywhere you need to.
Around the circumference of the circle, you will see four little squares. Click on any of these and you can drag the filter to an oval. Again, holding the shift will adjust both the width and height.
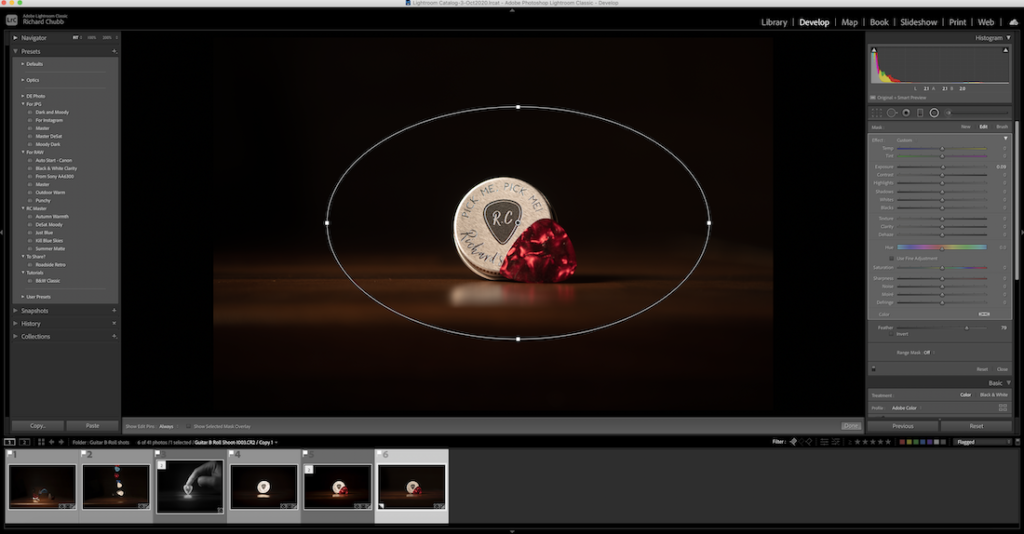
Now let’s get onto actually editing the photo!
Press the letter O on your keyboard. This will add a ‘mask’ which shows what parts of the images will be affected by the edit. The default colour is red, but if you are anti red, you can press shift and O and rotate through Green and Grey.
We are going to stick with Red.
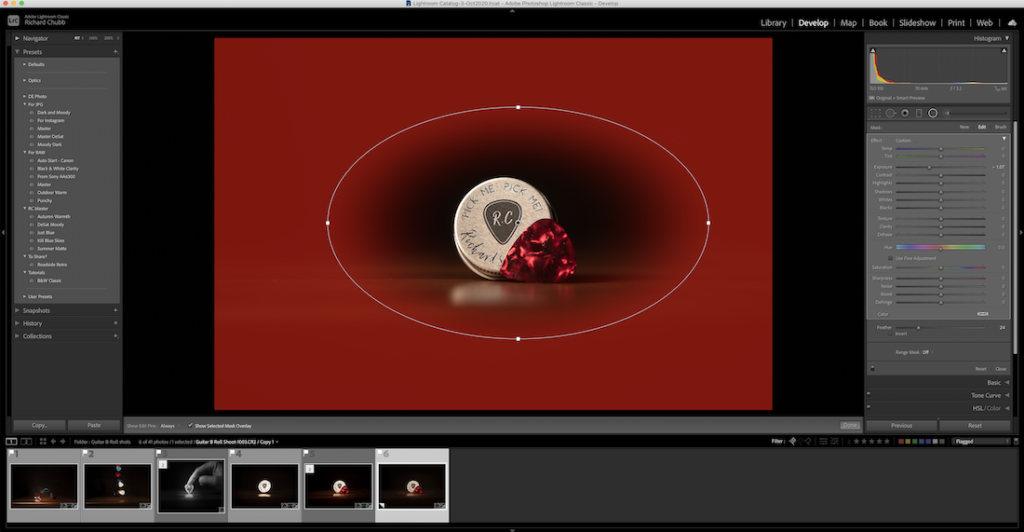
Once you have target the area you want, you can adjust the Feather on the filter.
Here are two examples. 100 for the first photo, and 0 for the second one. This is to show you how the feather can make a huge difference.

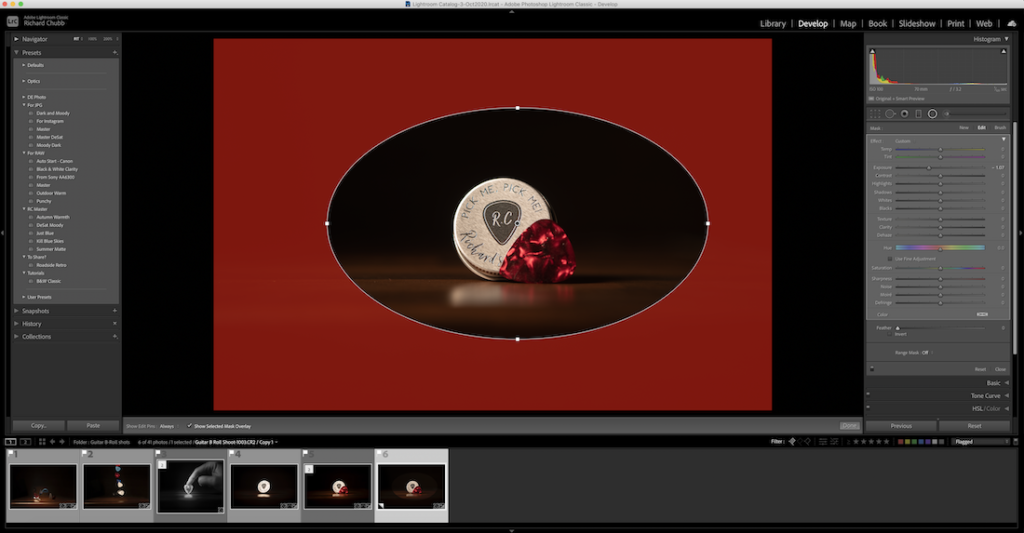
I usually go for whatever number makes the red mask just touch the subject we are highlighting.
In this instance, it is around 50
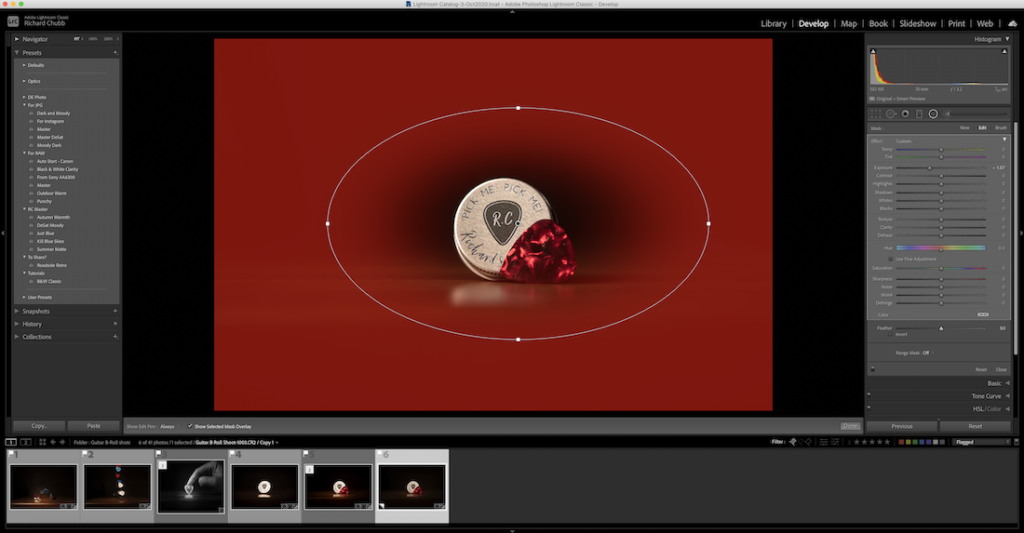
Click on O to remove the Mask, and then use the adjustment panel on the right.
You can adjust anything you want, but I am just going to adjust the Exposure, to darken around the subject.
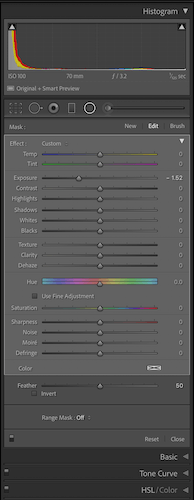
Once you have made any and all adjustments you want, you can click Done, in the bottom right hand corner.
But what if you wanted to brighten the subject a bit?
Duplicating the filter for extra impact
Supposing we wanted to make inside the circle, ie the subject, brighter?
Right click on anywhere in the Radial Filter, and chose Duplicate.
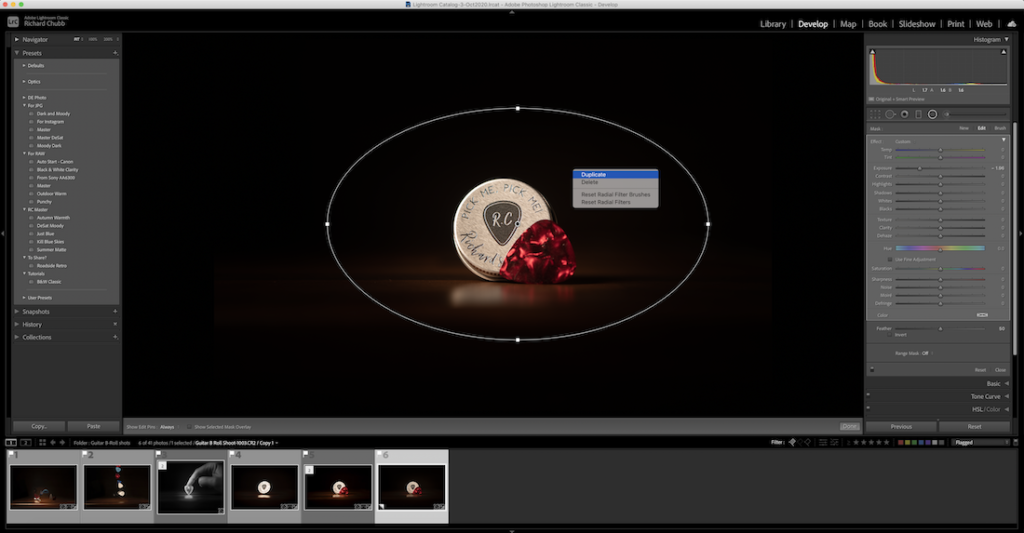
This will duplicate what you have already done. Meaning, the outside will now be twice as dark. Which we don’t want.
Hit O again to get the Red mask up.
Then, just below the Feather slider in the adjustment panel, you will see a check box named Invert.
Click this, and this will move the Red Mask inside the circle. This now means any adjustments we make will affect just the inside of the filter.
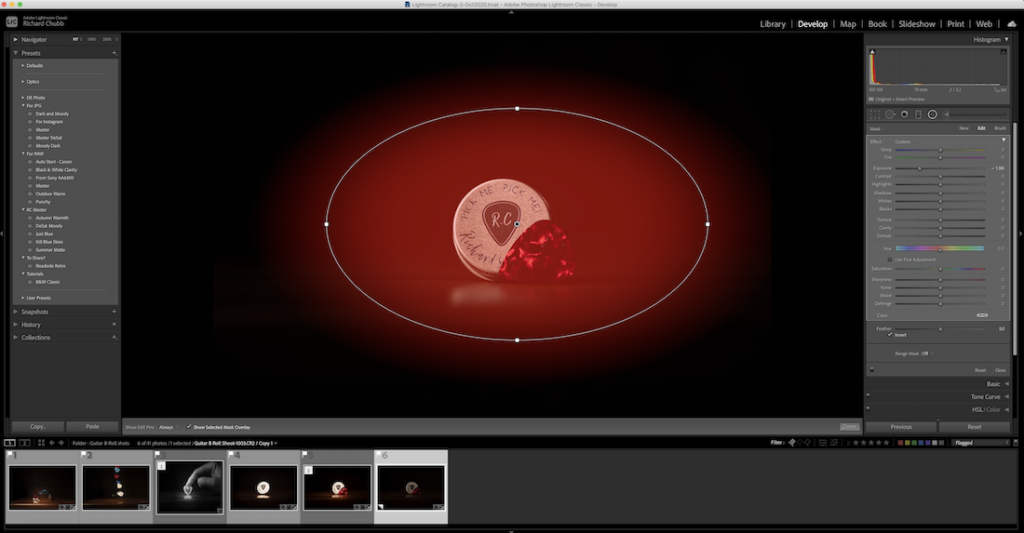
Now, re-adjust the Exposure filter so the inside of the Radial Filter is brighter.
You could even add some sharpening, clarity etc.
By the time you have finished, you could have something similar to what we shows at the start of this post, as per the below.


Summary
And that is it. A really super simple way to emphasise and highlight your subject, in a few minutes, using Lightroom’s Radial Filter.
I hope this was useful, don’t forget to check out the YouTube channel for this, and other great videos.
Until next time, thanks for reading!
Rich

