Lights Out in Lightroom Option
The Lights Out in Lightroom option is a great way to isolate your photo. Use it to just sit back, and see what an amazing job you have done editing it.
As with all my tips and tricks on this site, there is a YouTube version too. If you’d prefer to follow along to that, then that is a great option too!!
If you’re more of a words and pictures type of person, then read on!!
So Simple
As you can see from the below photo, there is a lot going on in the Lightroom dashboard.

Is the busyness from the panels on the let and right, and the thumbnail along the bottom are distracting you? If so, just hit the L button.
Hitting it once gives you a faded screen. Hit it again, and you have a totally black border, as per the below screen shots.


If the one of the left is a little too dark, then this can be adjusted.
Lights Out in Lightroom – Adjusting the Settings
If you want to adjust the setting for the Lights Out in Lightroom function, then just click on the Lightroom > Preferences in the top left hand corner.

When the following window appears, make sure you are on the Interface tab, and you can adjust the level of “Lights Out” here.
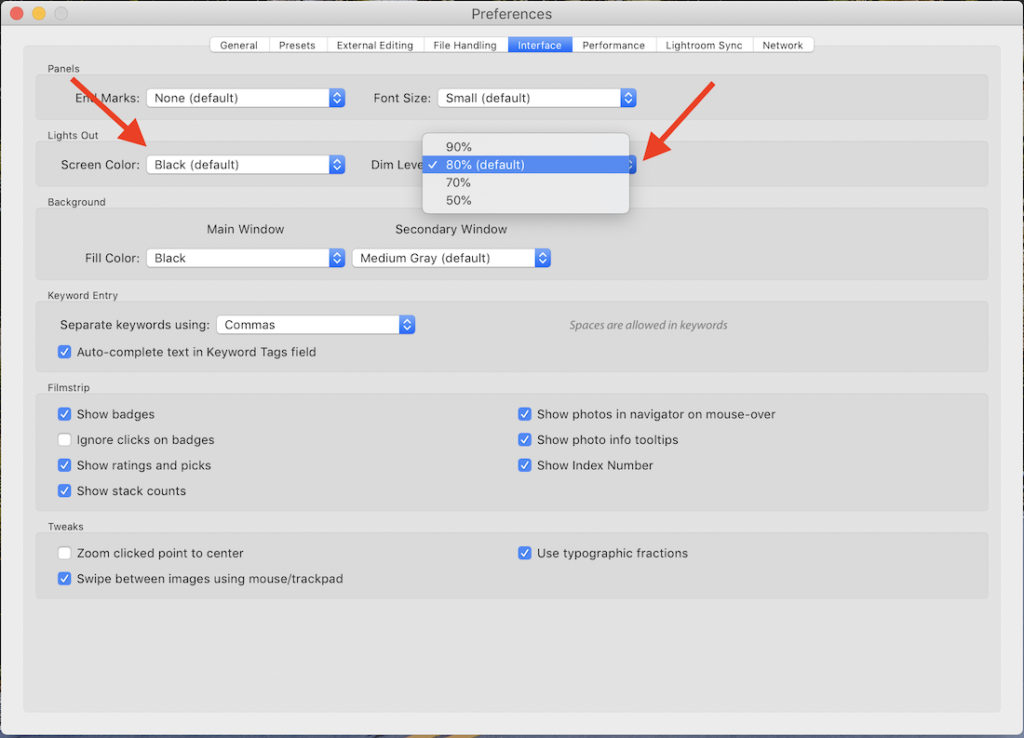
Lets assume you have changed it to 50%. The comparison below shows the difference between the default of 80%, and 50%.


I prefer the 80%, as it shows off the photo more.
The Lights Out in Lightroom function is a super convenient way of getting rid of the clutter, and inspecting your photo.
Hope you have found that useful, and don’t forget to head over the YouTube channel for loads more tips and tricks on photography and Lightroom.
Thanks for reading, see you next time!