Back up photos with no computer – My Ultimate Travel Solution
In my last article, I talked about 4 different ways to Back Up Photos while Travelling. In it, I mentioned which was my favourite that also enabled you to Back-Up photos with no computer. It is this process I am going to go through in a lot more detail that will hopefully help those looking for a Travel Photography Back Up solution.
I have already mentioned in the other article that backing up your photos when travelling is crucial. You get peace of mind that all your treasured memories are safe.
This method may not be as quick as, say just using two memory cards, or as rock solid as backing up to the cloud. However, I think this is a good method as it gives a decent amount of security. It is also quick and can be done anywhere even with no internet or computer.
The Method
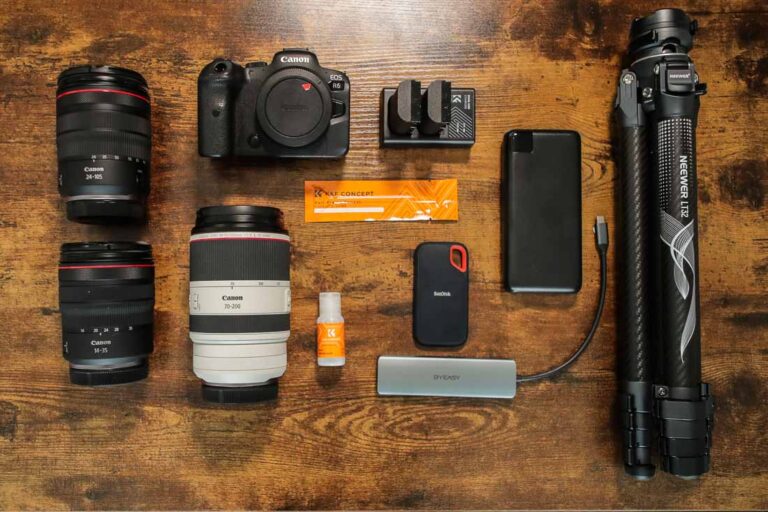
The way I am choosing to back up my photos while I am on the road is by using a combination of three things. An iPad or an iPhone, a USB Hub for Travel and a portable 1TB Hard Drive.
When connected to the iPad, it allows you to copy your photos from your SD card, directly to the Portable Hard Drive.
It is quick, reliable, and easy to see what you have backed up.
Preparation – Optional
There are a couple of things you can do before you head out on your trip to make your back-up process without a computer a bit quicker. This will help with less admin when you are travelling, depending on how you want to save your photos.
I plan on saving mine in a folder per day. So on the memory card, I will set up a folder for the date I am shooting.
If I am away from the 6th of January to the 13th of January, I will set up 8 folders on my Memory Card. One for each day.
The Canon R6 allows me to rename the folders as I create them, so I am using the following sequence:
_0106
_0107
_0108
The _ is to separate the Folder number, from the Folder Name. The 01 is the month, in this case, January. The 06 is the day, so the 6th. See the below screenshot for an example.

I will then just set up one folder on the Portable Hard Drive for my Trip, and for this example, USA 2024 Rockies Road Trip.
The Video
If you would rather watch the process, check out the video on exactly how to do it.
The Process to back up photos with no computer
This particular way to Back-Up your photos without a computer involves using a phone or an iPad. For this example, I am using an iPad, for one simple reason. I have a USB Hub that plugs into mu iPad’s USB C port, whereas my iPhone still has a lightning connector.
It is a really simple process for a decent, robust travel photography back up without a computer. You plug the USB Hub/Card Reader into your iPad. Into this, you plug your SD Card and your Portable Hard Drive.

Screenshots showing the Process

On your iPad, open the Files App and down the left-hand side, you should see the SD Card and your Portable Hard Drive

If you tap on your SD Card, you can navigate to the Daily Folders you may have set up. Otherwise, you will have just one folder.

Inside the relevant folder, you can find your photos. As I have a folder by day, at the end of the day, I just need to copy the whole folder.

So, I head back to the Daily Folders, tap and hold the day I want to back up and select Copy

I then navigate to the Portable Hard Drive and find the folder where I am backing up the trip photos. When there, I just tap and hold the white space, and choose Paste.

You can now see that the folder for January 6th photos has been added to my Rockies Road Trip folder…….

….and in it are the photos taken on that day (test photos around the office in this example!)
As I Travel….
As I travel, this really simple photography back up process should be repeated, ideally daily, and can be used in any situation when you may be away from home. After doing this you will have a back up on the Portable Hard Drive. You will also have a copy on your memory card(s) depending on how many cards your camera holds.
There is a main benefit to setting up a Folder per day on your SD Card. You do not have to scroll through all your photos to see where one day starts and another ends when looking to copy the next day. You can just copy the entire folder.
In addition, if you need to look back to find a photo on your camera, it is easy to select the folder for the day you need, then just look at those photos.
Summary – Back Up photos with no computer
As mentioned in a previous post, there are a few main benefits of backing up your photos this way. The ones that come to mind are unlimited storage (relative to your travel needs). It is quick, and even with 200 photos a day should only take a matter of minutes.
You do not need WiFi, and above all, you do not need a computer to back up your photos. You can use an iPad/tablet, or perhaps a phone. Although I have not tested on a phone I do not see why it wouldn’t work.
As travel photography back ups go, this is going to be my favourite for my longer trips. By the way, check out THIS post if you want to improve your travel photos!!
I hope you found this useful, and feel free to sign up for the newsletter, or my YouTube channel for more!

