Matching Exposure for Multiple images in Lightroom
Are you looking for a way of Matching Exposure for Multiple images in Lightroom?
Perhaps you were out on a shoot, and that big ball of fire in the sky decided to pop out from behind the cloud it has been hiding behind. All of a sudden your perfectly exposed photos are too bright.
If you want to see this run through on video, here you go. If not, read on.
Once you have added the photos to Lightroom, you can set about the task of Matching Exposure for Multiple images in Lightroom.
Here are the 5 photos we are going to be using. Shot in Yosemite National Park, in March 2019, you can see that only one of them is half decent. That would be image number 3.
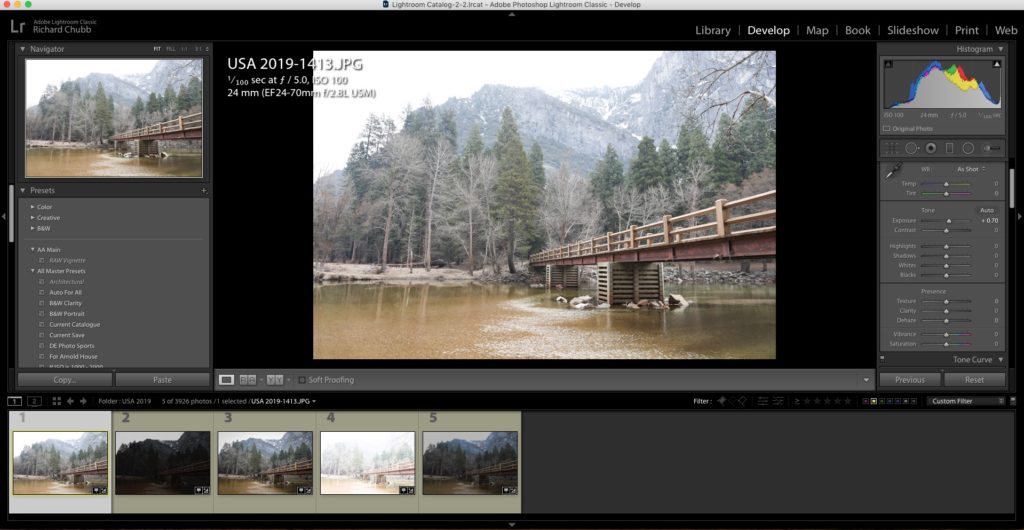
Basically we want to try to make the other photos math the exposure for photo number three, without editing each one individually, and this is in fact, really easy.
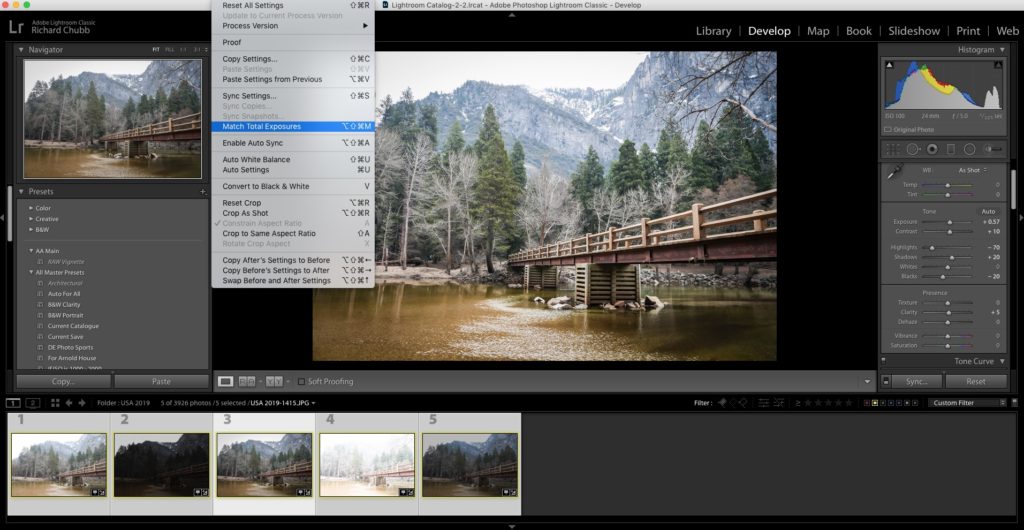
In the develop Module, press Command (MAC) or Control (PC) and highlight all of the images you want to match. Once they are highlighted, release the Command or Control key, and click back on the Master one, ie the one you want all the others to match.
Matching Exposure for Multiple images in Lightroom – Here comes the good bit!
As above, when you have done this, click on Settings > Match Total Exposure, and voila, all the other images fall neatly in line with the ‘Master’ one.
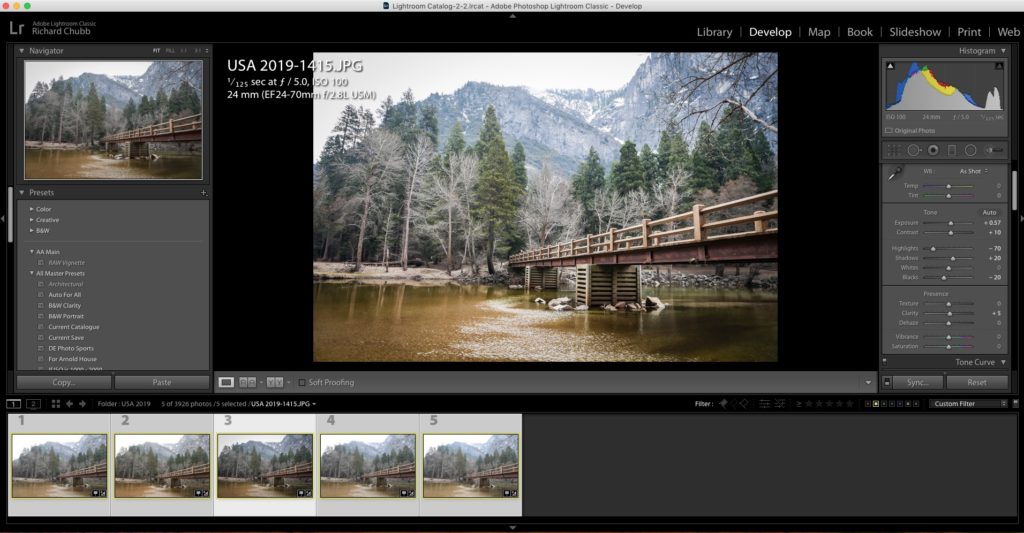
You can see in the above that all the images are now of similar exposure.
Hope you found this useful. Let me know in the comments if you have abetter way to get a base exposure match for multiple images.
Feel free to sign up to the mail list to get weekly tips and tricks.
I wanted to document this in case you find it useful, be sure to check out my other Editing Tips!
Also head over to the YouTube Channel to check out this and other useful videos.
Thanks for stopping by, see you next time……:)


