Canon R6 Custom Shooting Modes for Video
There has been a lot of chatter online about the Canon R6 Custom Shooting Modes for Video. Or rather the lack of them.
Some of the links in this post are affiliate links. This means we will earn a small commission on the products or services you purchase using the links. There is no additional cost to you and if you do purchase, then I thank you for supporting the website.
I thought this blog post may be useful as there is a way you can program the C1, C2 and C3 dials for different video settings, but you do lose some of the functionality of ‘proper’ video recording.
Update on 1st November 2021 thanks to a viewer’s comment.
Using the movie record button the recording trips to a mainly Auto mode. This is ok for simple walkabout filming which is what I use the camera for as the shutter seems to fix at 1/100 unless really bright or really dark, as ISO seems to adjust first.
Canon R6 Custom Shooting Modes – The Video
If you’d prefer, you can watch the video I made.
Canon R6 Custom Shooting Modes for Video – My Set Up
By way of a background, I thought I would write a short paragraph explaining how I use my Custom Shooting Modes when I am travelling.
For me, the photos are just as important as the video, if not more so. I use the 3 Custom Modes along with the Video mode for all of my requirements.
This is how I have it set up.
| Custom Mode | Priority | Shutter Speed | Aperture | ISO | Used for? | Reason |
| C1 | TV (Shutter) | 1/800 | Auto | Auto | Photography | Fast Action (kids running, animals etc) |
| C2 | AV (Aperture) | Auto (min 1/125) | f8 | Auto | Photography | Landscapes, Portraits, General. I adjust Aperture when necessary |
| C3 | TV (Shutter) | 1/125 | Auto | Auto | Video | Used for Video. 1/125sec for 60fps video |
| Video | N/A | 1/250 | F11 | Auto | Video | Hi Frame Rate enabled. 120FPS. Adjust Aperture when shooting as ness |
What I use them for
My camera as a default stays on C2. The bulk of my photography would use these settings when travelling with the family. Snapshots, family fun, general travel / touristy type photos.
If I want to record a video, I flick it to C3, and this records generally any type of video. As it is 60fps, you can slow it down by 50% and it doesn’t suffer any degradation in quality like it would if you slowed 24fps down by 50%.
For faster-moving subjects, I use C1 Custom Shooting modes. If we are at a zoo or wildlife park. Or perhaps Max on a swing, or running and jumping. Maybe shooting something out of the car while driving (not me driving obviously!!)
Finally, if I want to shoot something in slo-mo, I use the Video function of the Canon R6. This is always set up in the high frame rate option. The only thing I need to do, when I change to this mode, is to make sure the shutter speed is set at 1/250.
By the way, don’t forget to keep an eye on the Firmware releases for your camera, it is very easy to update, and I can show you how!
I am not an expert, but I do know the shutter speed should be roughly twice as much as the FPS for video. So, if you want 120 fps slo-mo, set the shutter speed at 1/250.
I am not sure why this is, so if anyone wants to let me know, feel free to comment below.
Why I use it like this
Convenience. Plain and Simple. If I am out on a trip, or travelling around, I want to be able to recall my settings as quickly as possible. It is possible to program the Custom Shooting Modes all for different Photography settings for example, but I do it like this to try and encompass video too.
If I am out shooting Landscapes, or perhaps the local Falconry display, then I will take a bit more time, maybe use manual to tweak to the exact situation. But, when it comes to travelling, shooting on the run, or just family trips, then convenience is more important.
The main Kit I usually use when making Videos
Please note I use the Telsin Charger,
but GoPro Brand Batteries
Setting Up the Photography Custom Modes (C1 and C2) for Photos
Turn the dial to the primary setting you want.
Refer to the table above. If I want to save a setting for fast action or a high shutter speed, I will turn the dial to Tv (Shutter Priority).
I will then set the ISO to Auto.
After that, I will set the AF settings. For example, as I am using this to track moving subjects, I will set it as Continuous AF. There are a lot of settings, which is for another blog post.
Basically, set the camera to the settings you want. Then, go into the menu, head over to the Yellow menu option 5, choose Custom Shooting Mode.
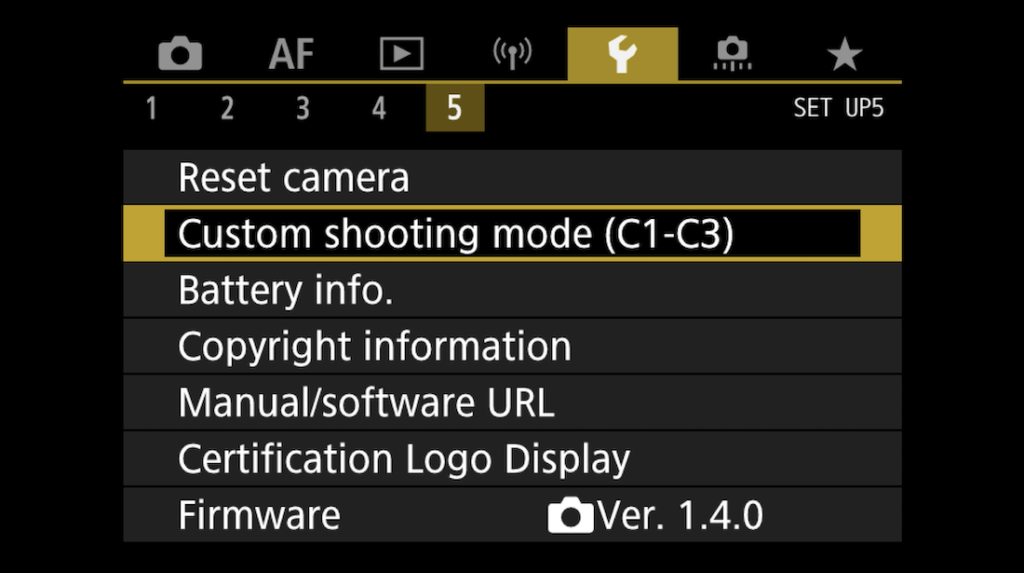
Then, Register Settings
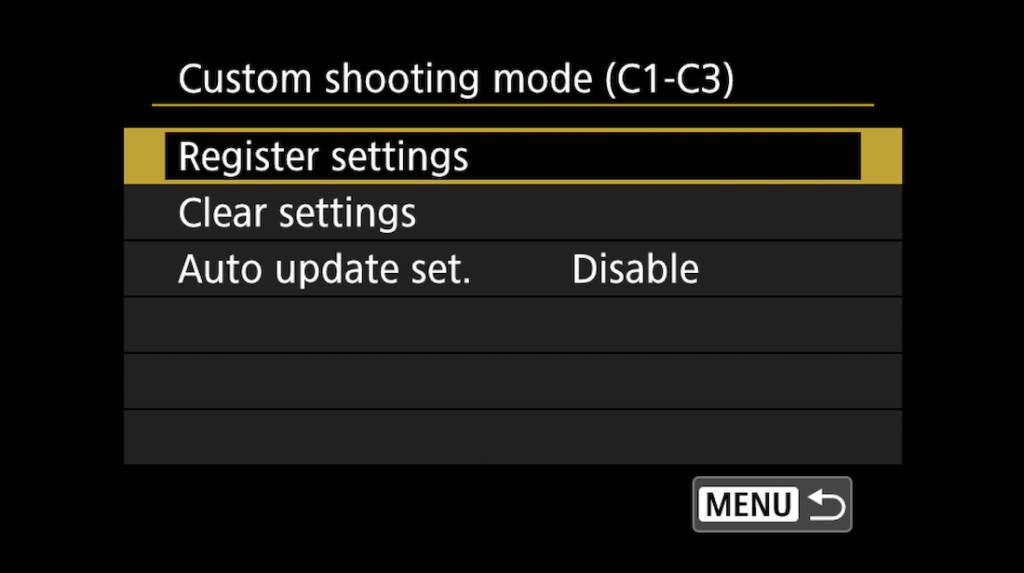
and select the Mode you want to register it to.
Once done, turn the dial to that mode, C1 for example, and you will find those settings are saved. Feel free to go back to Tv mode, mess around with the settings. Turn to C1, and you will find the settings you just saved.
Repeat for C2 for your required settings. Once done, I will have two custom modes. One for Fast, action-type photos. The other is for walk-around, landscape-type family travel photos.
Setting Up the Canon R6 Custom Shooting Modes (C3 and Video Mode) for Video
OK, so now it is time to set up the Custom Modes for Video.
A reminder and disclaimer that this is not going to work if you want to use your R6 for proper filmmaking. Total Manual mode. Utilising the new option of Canon Log 3, which was added after the 1.4 Firmware update.
This is more for run and gun type photography and filming. In any case, let’s get into it.
I set up up C3 for my ‘one size fits all’ filming requirement.
Move the dial to Tv mode.
Set the shutter speed at 1/125 second.
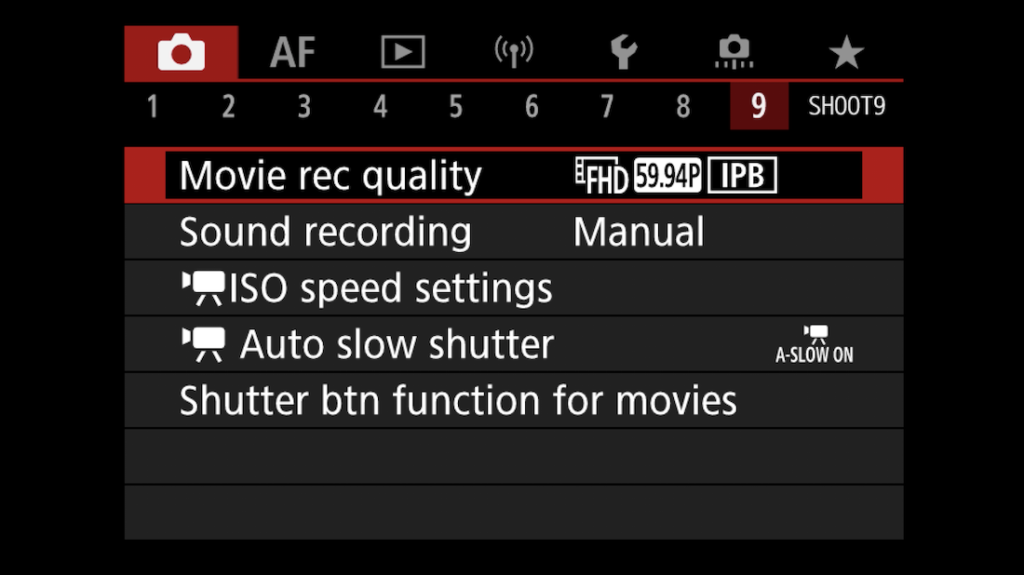
Go into the Canon R6 menu and head over to the Red menu 9.
Select Movie Rec Quality.
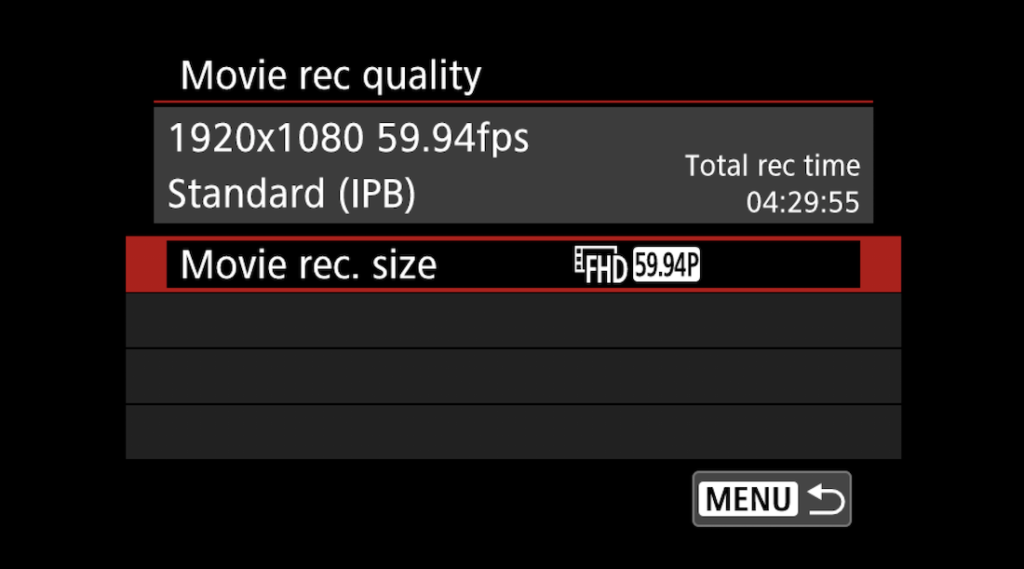
Select Movie rec. size
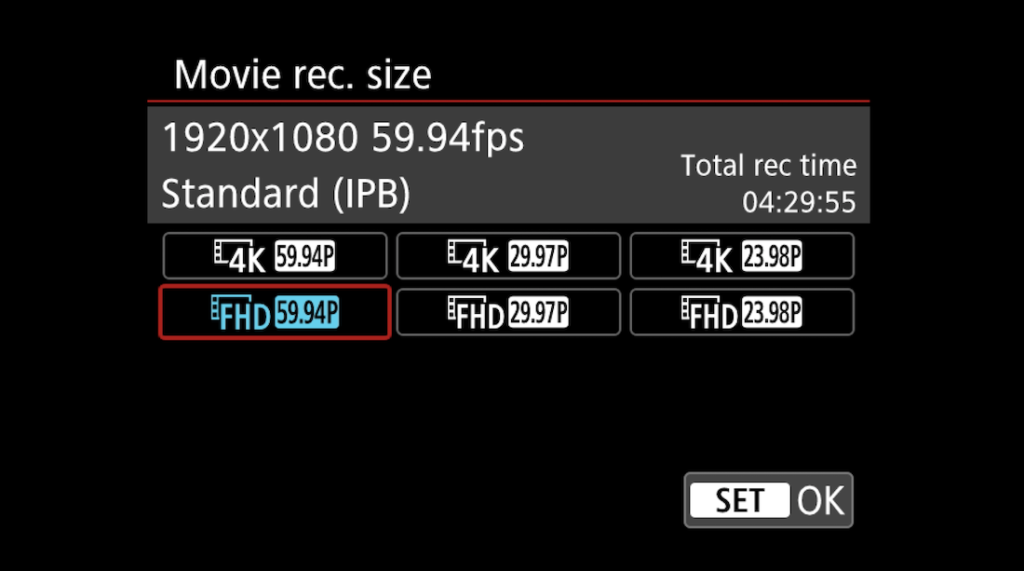
Chose one of the 59.94p settings.
You can then chose the AF settings that suit your type of filming (Tracking, Eye AF etc).
When done, go into the menu, head over to the option Yellow menu option 5, choose Custom Shooting Mode.
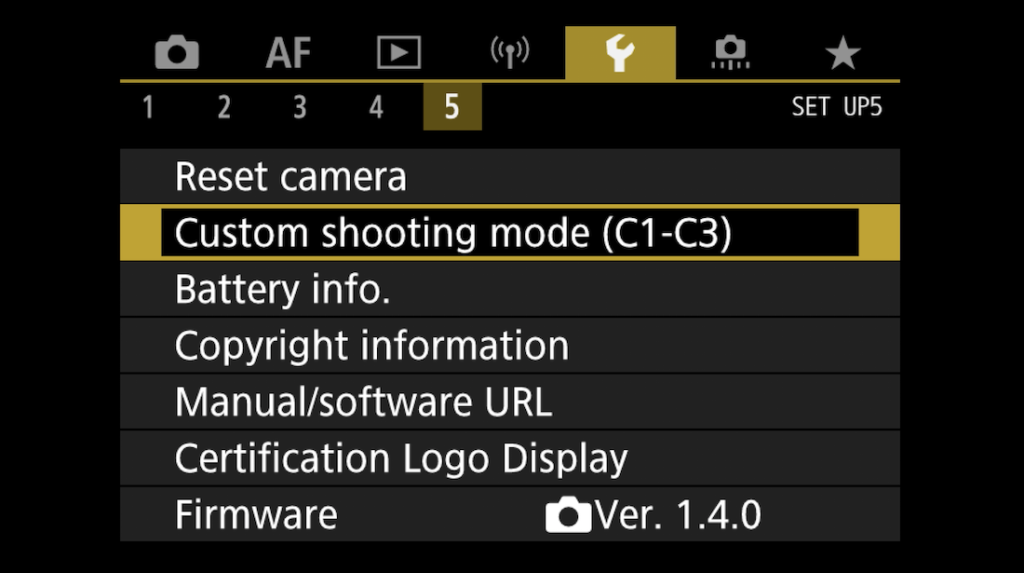
Then, Register Settings
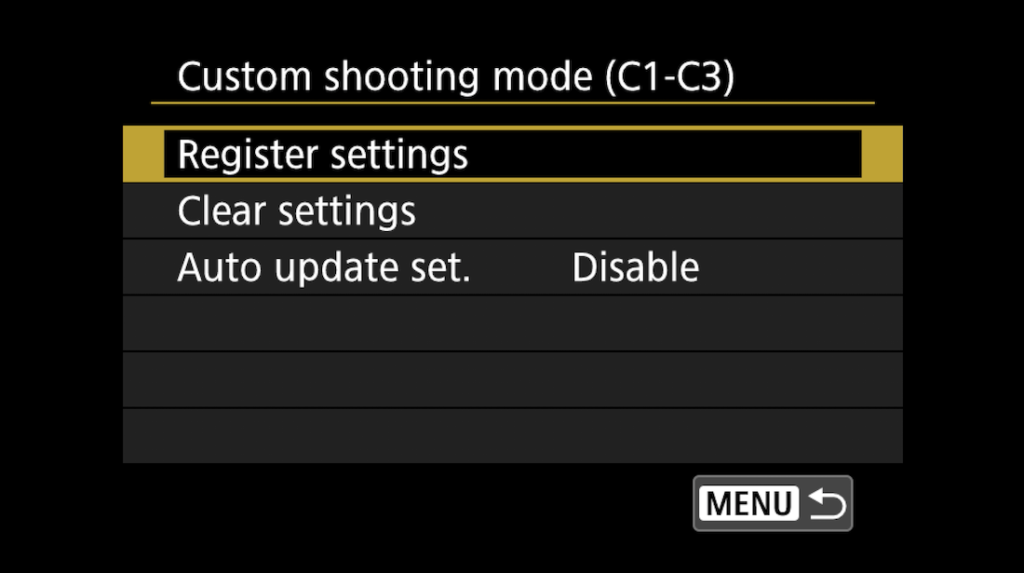
Select the Mode you want to register it to.
Out of the three Custom Shooting Modes, I use C3.
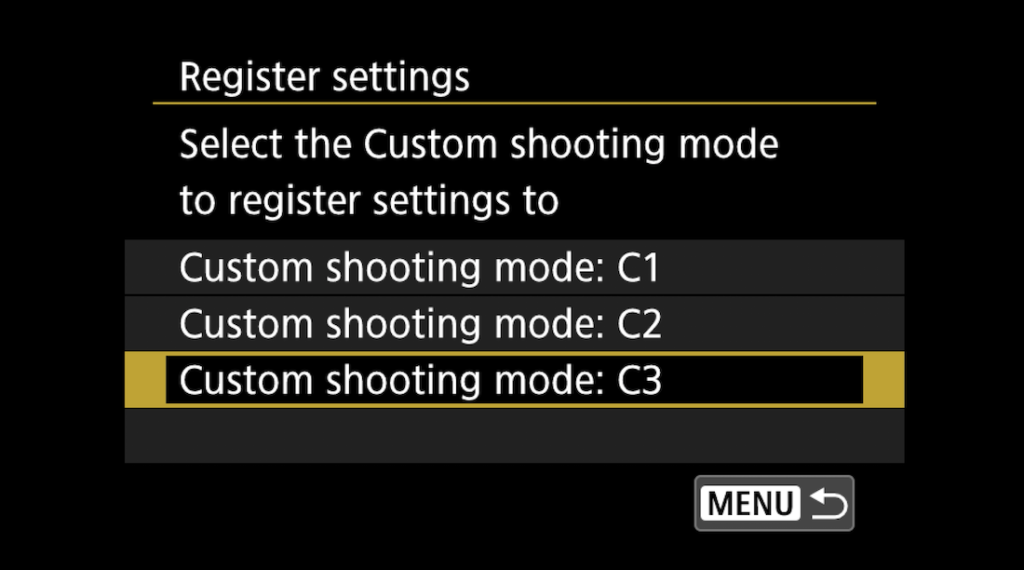
Your video settings are now saved to Custom Shooting mode C3.
We are now going to look at saving settings to record in super slo-mo.
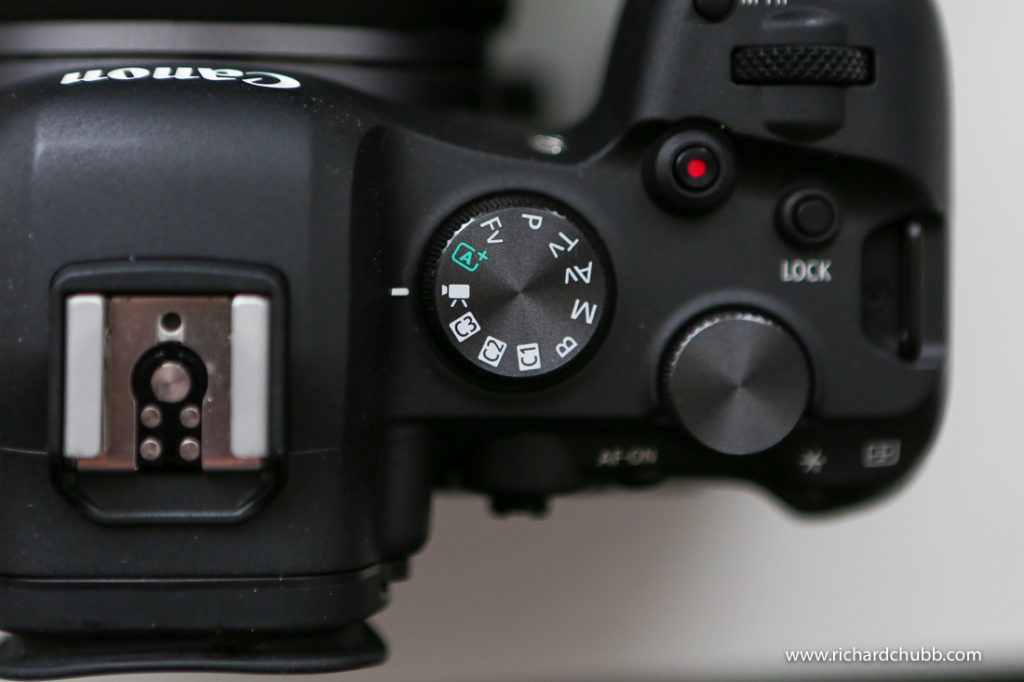
Move the dial to Video mode
Head into Red menu 1 and Choose Movie rec Quality.
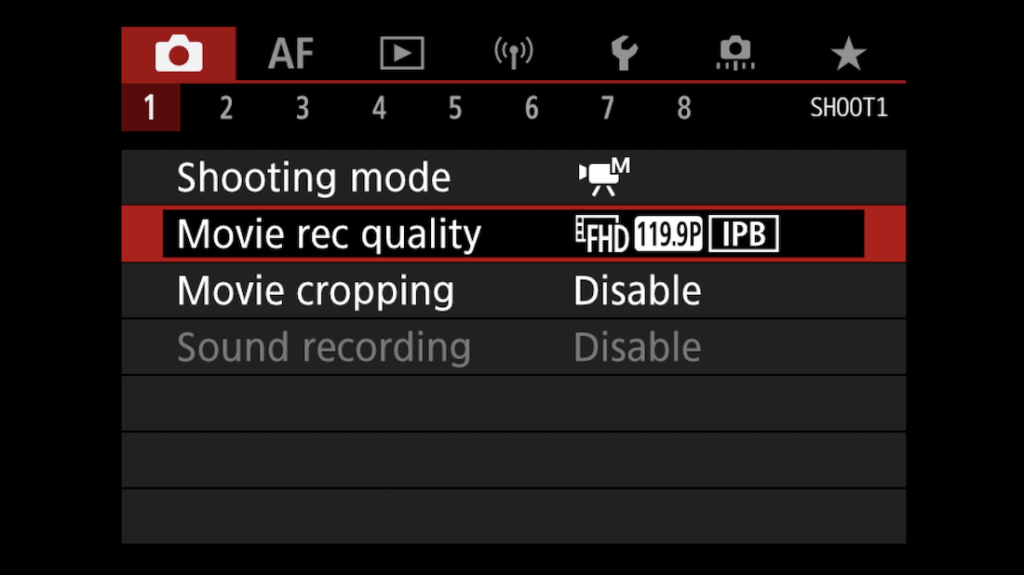
Enable High Frame Rate.
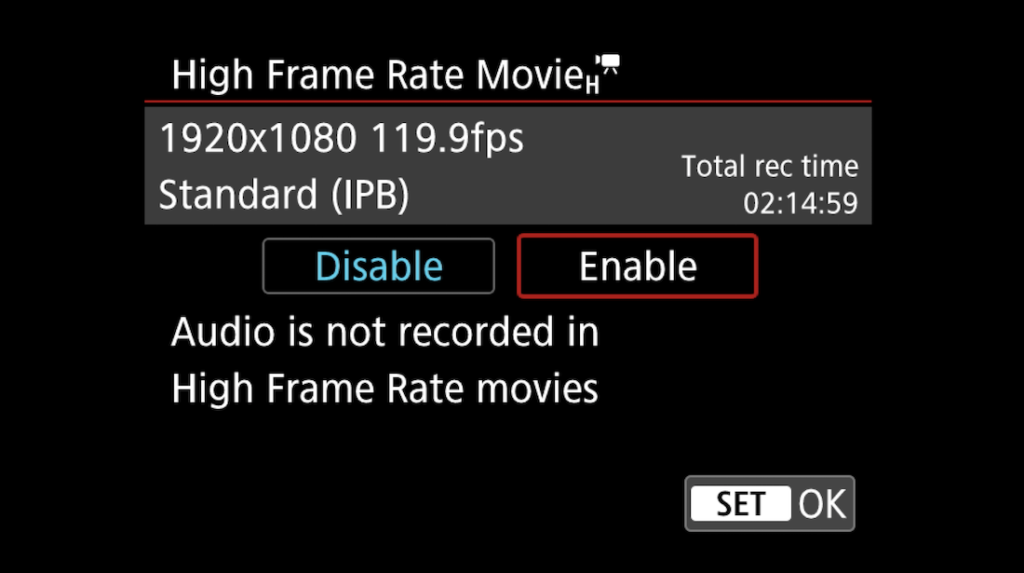
As long as your shutter speed 1/250s, then you should now have super slo mo when needed.
The Advantages
- Easily recall your favourite settings using the Custom Shooting Modes
- Shoot the same photo and video settings whenever needed
- Recall most used video settings for simple video recording
- Cater for action and run and gun photos
- Cater for simple video recording and super slo mo
A few disclaimers and caveats! (The disadvantages)
- You do not have full control over video settings.
- The aperture (in C3) is determined automatically.
- You are restricted to the Photo picture styles (no Canon Log 3)
- ..and many others I am sure a video noob like me isn’t aware of
Summary of Custom Shooting Modes for Video
So, that is it.
C1 now shoots action photos with a high shutter speed.
C2 now shoots everything else. A kind of one size fits all
C3 shoots the most basic video requirements.
Video mode now shoots super slo-mo when needed.
If anyone wants to comment on this, please feel free below and do correct me if I am wrong on anything, or if there is a better way. Who knows, perhaps Canon will issue a firmware update in the future that gives you separate Custom Modes for both photo and video!
Until the next one, take care.
Rich

